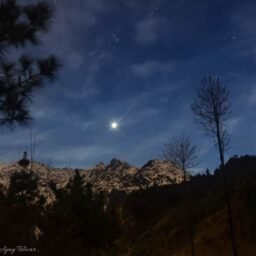
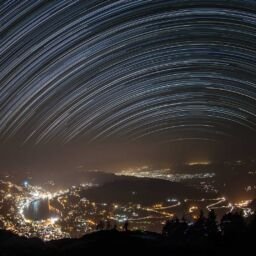
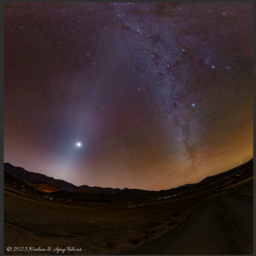
I really love to make Little Planet Panoramas with star trails in the sky. This one is made at a hill side between Ratnari and Karena Peak, in December 2021. The dirt road to the peak was unpassable due to accumulated snow, so we parked on the nearby hill side clearing, pitched our tents for the night.
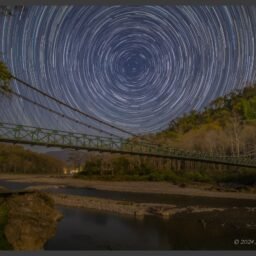
In the image the earth is in the centre, the circle represents the entire horizon around us. South is on top, and you can see the lighted tents pitched there. In the southern direction in the sky you can see trails of the brightest star Sirius and second brightest star Canopus.
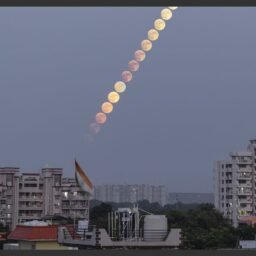
Towards the west (right side) you can see the path of a really bright meteor. Towards the bottom is the pole star.
How to make 360° x 180° Little Planet Panorama with Star Trails
Lens used – Canon 8-15mm Fisheye Lens. This lens when it is set at 8mm (widest), it captures 180° field of view, when used with a full frame camera, sensor size 36×24 mm. You get a circle in the centre of the frame, with the surrounding areas black.

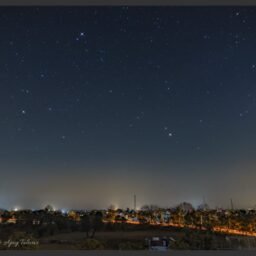
Step 1 – Use the fisheye lens to shoot in the direction of the horizon. Although the fisheye lens can cover the entire 360° of the horizon in just two images, with the camera facing opposite directions, but it will be difficult to stitch these two images in a stitching software. You can go for three images, four images, all facing towards the horizon, say north, east, south and west directions. (in the example set below, I clicked

I like to shoot six photos so that there is absolutely no problem in finding control points in the adjacent images and stitching the panorama. So suppose I start off with the facing the camera northwards, then for the next photo I will turn the camera by 60°, and continue to shoot a total of six images (azimuth – 0°, 60°, 120°, 180°, 240° & 300°). These images are momentary, short exposures for capturing the landscape around. The images will show from Zenith to the Nadir, tripod legs will be visible in all the images. For each image I level the camera parallel to the horizon as well as bring the horizon in the centre of the image. The exposure is kept to manual and is suited for the brightest portion of the horizon. The same exposure is used for all the horizon shots.
Step 2 –For the seventh image the camera will face the zenith. The tripod head has to be turned upwards and the centre of the image would be zenith and the entire horizon would be captured. I take care that the camera back is level in all respects. I step back towards the south direction and look at the camera, level it, then I step back towards the east or west and check if the camera is level. Sometimes the tripod head is not able to point the camera towards the zenith, in that case I open the quick release plate and re-orient is so that camera can face the zenith.
Step 3 – Now I start off the star trail sequence (focus, test exposure and then start sequence). The sequence of images lasts for 1-2 hours, sometimes more. ISO is kept low, say 400, and the images are underexposed to keep the star colour from turning white.

Processing Step 4 – Convert all the raw images into tiff or jpegs.
Processing Step 5 – Construct the star trail image from all the zenith-facing images.

Processing Step 6 –Load the seven images in panorama stitching software like PTGui, and make the panorama (rectangular). Control points need to be added in all of the images, specially the seventh zenith image, as the software generally is not able to match the images

Processing Step 7 –Rotate the panorama by 180°, upside down, and then make the projection to ‘Little Planet, and reduce the panorama to about 250° instead of 360°.